A thermal mass meter is one of the highest-value instruments you can add to a residential building’s energy infrastructure — but only when it’s correctly specified, correctly placed, and correctly commissioned. This guide covers every decision point, from initial selection to long-term maintenance.
Residential buildings account for a significant share of global energy consumption, yet gas and air flows inside most homes are measured — if at all — by utility revenue meters that report only monthly totals. A thermal mass meter changes that equation by delivering real-time, mass-accurate gas flow data at the point where it matters: the boiler inlet, the heat pump air duct, the HVAC supply line, or the domestic hot water circuit. The difference between a well-selected, properly installed thermal mass meter and a poorly specified one can be the difference between energy insight and energy noise — and this guide exists to make sure you get the former.
This article is written for building contractors, mechanical and electrical engineers, facilities specifiers, and energy management professionals working on residential or multi-dwelling projects. It is a practical working reference — not a marketing overview — covering selection criteria, step-by-step installation, safety requirements, commissioning, maintenance, and lifecycle planning in full technical depth.
Key Terms Defined
The following terms appear throughout this guide. Each is defined here on first use for readers who are new to thermal mass measurement technology.
- Thermal Mass Meter (TMM)
- An instrument that measures the mass flow rate of a gas — natural gas, air, LPG, or others — by quantifying heat transfer from a heated sensing element to the flowing gas. Reports in kg/h, SCFM, or Nm³/h without requiring separate pressure or temperature correction.
- Mass Flow Rate
- The quantity of gas passing a measurement point per unit of time, expressed in units of mass (kg/h or lb/min) rather than volume. Mass-based measurement is unaffected by pressure and temperature changes — critical in HVAC applications where both vary continuously.
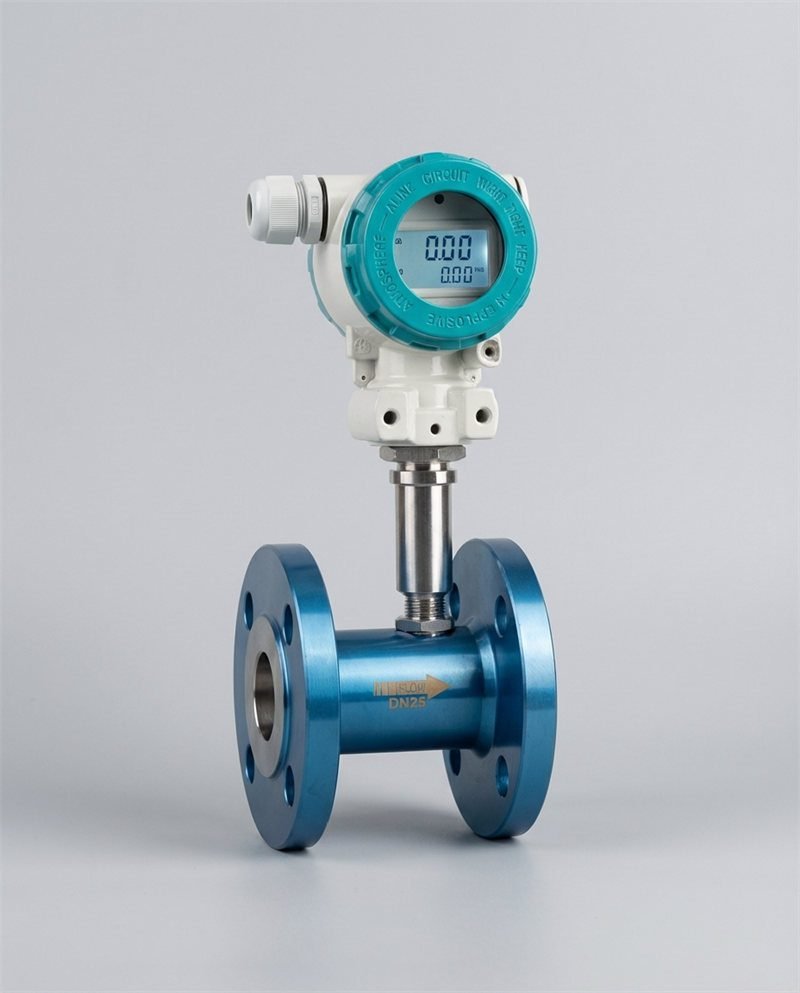
- Insertion Meter
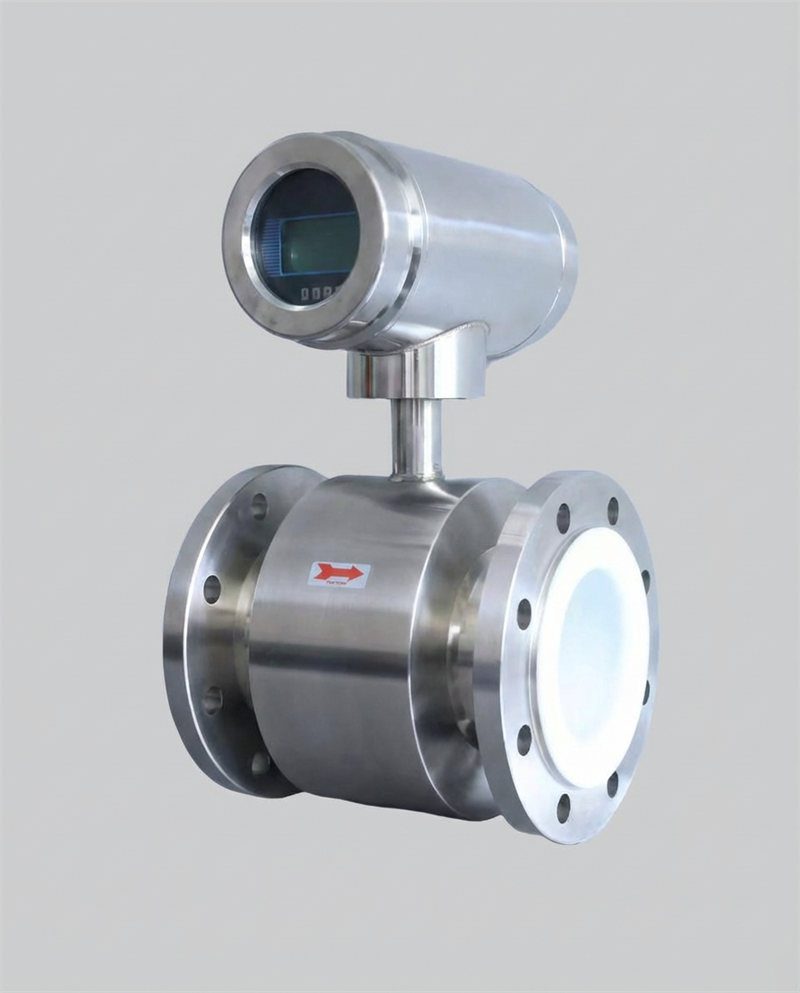
- A probe-style meter inserted into a pipe through a hot-tap fitting. Measures flow at a single point or multi-point in the pipe cross-section. Preferred in residential retrofit applications where pipe cannot be cut.
- Inline (Full-Bore) Meter
- A meter that replaces a section of pipe entirely and measures the full cross-sectional flow. Higher accuracy than insertion type, but requires a system shutdown for installation.
- Straight-Run Requirement
- The minimum length of unobstructed, straight pipe upstream and downstream of a meter, expressed in pipe diameters (D). Required to develop a symmetrical flow profile at the sensor for accurate measurement.
- Commissioning
- The process of verifying, after installation, that a meter is reading accurately — including zero-flow check, span verification, and BMS data integration testing — before entering operational service.
- Turndown Ratio
- The ratio of the maximum to minimum accurately measurable flow rate. A meter with a 100:1 turndown can read accurately at 1% of its full-scale flow — important in residential applications where gas demand varies widely between standby and peak heating.
- BMS (Building Management System)
- A centralized control and monitoring platform that integrates sensor data — including thermal mass meter outputs — via protocols such as Modbus, BACnet, or M-Bus to automate energy management decisions.
Understanding Thermal Mass Meters and Their Role in Homes
What a Thermal Mass Meter Is and How It Works
A thermal mass meter operates on a deceptively simple physical principle: when a gas flows over a heated element, it carries heat away. The rate at which heat is removed is directly proportional to the mass flow rate of the gas. The instrument measures either the power required to keep the sensor at a fixed temperature above the process gas temperature (constant-temperature differential method), or the temperature drop between an upstream and downstream sensor pair (constant-power method). Either way, the output is a direct mass flow reading — no separate pressure transducer or temperature correction algorithm required.
This matters in a residential context because gas supply pressure in residential mains varies by season, appliance demand, and local infrastructure — sometimes by ±10–15%. A volumetric meter (the kind installed by most utilities) reports standard cubic feet or cubic metres at reference conditions, but only after applying an assumed pressure correction factor. If the actual supply pressure deviates from the assumed value, the billing meter’s energy calculation is wrong. A thermal mass meter eliminates this source of error entirely.

Benefits for Energy Efficiency, Comfort, and Demand Management
The practical benefits of installing a thermal mass meter in a residential building extend beyond energy billing accuracy. Real-time mass flow data enables three capabilities that a utility billing meter cannot provide:
Leak detection at the circuit level. During unoccupied hours — nights, weekends — any residual gas flow reading on a closed appliance circuit is evidence of a leak or a stuck valve. Sensirion’s field study on thermal-mass gas meters deployed in residential networks found that all meters were still operating well within specification after 10+ years in service, and that the continuous flow data provided a reliable early-warning signal for leaks that visual inspection alone would have missed.
Demand-based energy management. When mass flow data is integrated with a home energy management system or smart thermostat, the system can track actual gas consumption against heating degree days, identify abnormal consumption patterns (a boiler cycling too frequently, a hot water system running at excessive setpoint), and generate actionable alerts — rather than waiting for the monthly utility bill to reveal an anomaly.
Sub-metering for multi-dwelling and mixed-use buildings. In apartment buildings, student accommodation, or commercial-over-residential developments, individual-unit gas sub-metering is increasingly a regulatory requirement under EU energy efficiency directives and emerging building code frameworks. A thermal mass meter on each unit’s gas feed — integrated via M-Bus or Modbus to a building-level data concentrator — provides the audit-grade data needed for fair energy cost allocation.
Common Residential Applications and Limitations
In a residential context, thermal mass meters are most commonly deployed on natural gas supply lines (feeding boilers, furnaces, cooktops, and water heaters), on compressed-air circuits in workshop or utility spaces, and on HVAC supply ducts where air mass flow data feeds demand-controlled ventilation logic. They are not suitable for liquid measurement (water, glycol, steam condensate) — those applications require electromagnetic, ultrasonic, or Coriolis meters. They also require the gas stream to be clean and dry: moisture condensation or particulate contamination on the heated sensor element causes measurement error and shortens sensor life. In wet or dirty gas applications, a particle filter and inline dryer upstream of the meter are standard prerequisites.
Key Specifications to Consider Before Buying
Measurement Range, Accuracy, and Resolution
The three specifications that most directly determine whether a thermal mass meter will perform in a residential application are measurement range (minimum and maximum flow), accuracy (the closeness of the reading to the true value), and resolution (the smallest flow change the meter can detect).
For residential natural gas applications, boiler flow rates typically range from 0.5 Nm³/h at minimum fire to 6–10 Nm³/h at full load for a 25–35 kW domestic boiler. A meter with a turndown ratio of less than 20:1 will be unable to read accurately at minimum fire — producing either a zero output or an unreliable low-flow reading that makes part-load efficiency calculation impossible. The minimum specification for residential gas metering should be a turndown ratio of at least 50:1, and ideally 100:1 for systems with multiple appliances on one meter circuit.
Accuracy should be stated as a percentage of reading (not percentage of full scale) — a distinction that matters enormously at low flows. A meter rated at ±1.5% of full scale is only ±1.5% accurate at 100% of full scale; at 10% of full scale, the same meter may have ±15% uncertainty — a figure that makes part-load energy balancing meaningless. Ask for the error specification in % of reading across the full turndown range before specifying.
| Specification | Minimum Acceptable (Residential) | Best-in-Class Target | Why It Matters |
|---|---|---|---|
| Turndown Ratio | 50:1 | 100:1 or better | Enables accurate reading from pilot/standby to full-load demand |
| Precisión | ±2.0% of reading | ±1.0% of reading | Stated as % of reading, not % of full scale — critical at low flows |
| Repetibilidad | ±0.5% of reading | ±0.2% of reading | Determines reliability of trend analysis and leak detection |
| Response Time | < 5 seconds | < 1 second | Fast response captures transient demand peaks and valve events |
| Operating Temp. Range | −10 to +60 °C | −20 to +70 °C | Must cover utility room and outdoor installation environments |
| Operating Pressure | Up to 2 bar g | Up to 10 bar g | Residential gas supply typically 20–30 mbar; allow headroom for transients |
| Resolution | 0.01 Nm³/h | 0.001 Nm³/h | Fine resolution enables detection of very slow leaks between appliances |
System Compatibility and Data Integration
A thermal mass meter that cannot communicate with the building’s energy management infrastructure is just a display on a wall. Before specifying, confirm the output options against the receiving system: 4–20 mA analogue is the universal hardware-agnostic option compatible with virtually any controller, but it carries only a single variable (flow rate) and requires a separate pulse output for totalized consumption. Modbus RTU/RS485 is standard in most modern meters and supports multiple variables (flow rate, totalized consumption, gas temperature, diagnostic status) on a single two-wire connection. M-Bus (EN 13757) is the European standard for utility sub-metering and is required for EU regulatory compliance in multi-dwelling applications. For smart home integration, meters with native Modbus TCP/IP or wireless output (LoRaWAN, Zigbee) are increasingly available — enabling data to flow directly to cloud-based energy dashboards without a dedicated data concentrator.
Durability, Environmental Ratings, and Warranty Terms
Residential utility room environments present specific challenges: temperature cycling between heating-season extremes and summer ambient, occasional condensation, and vibration from adjacent boilers and pumps. The minimum ingress protection rating for a residential meter installation is IP54 (dust-protected, splash-proof); IP65 is preferred for outdoor installations or humid utility rooms. For meters installed outdoors — on external gas service pipes, heat pump air ducts, or external wall penetrations — IP67 (submersion to 1 m for 30 minutes) is the appropriate specification. Warranty terms in the market range from 12 months to 5 years; a manufacturer offering less than 24 months on a meter intended for a 15-year service life is signalling low confidence in their own product’s reliability.
Regulatory and Safety Considerations
Building Codes, Permits, and Compliance
Installing instrumentation on a residential gas supply line is a regulated activity in virtually every jurisdiction. In the United States, work on gas-carrying pipework must comply with the International Fuel Gas Code (IFGC) and the National Fuel Gas Code (NFPA 54), and local amendments — which in many states require a licensed gas contractor for any work downstream of the utility meter. A building permit is typically required for any new instrumentation or pipe modification on a gas system; operating without a permit not only risks enforcement action but may also void the property’s homeowner insurance if an incident occurs. In the European Union, EN 1776 (gas meter installation requirements) and EN 1775 (gas supply for buildings) set the baseline compliance framework, with individual member states adding national annexes.
For electrical connections — including the meter’s power supply and signal wiring — compliance with NEC Article 250 (grounding and bonding), NEC Article 500/501 (hazardous locations, if the meter is installed in a potentially gas-rich environment), and local electrical codes is mandatory. In practice, this means a licensed electrician must complete the power and signal wiring in most jurisdictions, regardless of who installs the mechanical side of the meter.
Electrical and Mechanical Safety Requirements
From an electrical safety standpoint, the three non-negotiable requirements for thermal mass meter installation are: proper grounding of the meter body (to prevent static charge accumulation in gas service, which is an ignition risk); separation of signal wiring from AC power cables by a minimum of 300 mm to prevent inductive interference; and the use of explosion-proof (Ex d or Ex ia) meter variants in any location classified as a hazardous area under IEC 60079-10, including enclosed spaces where gas could accumulate following a leak. The Sage installation manual, a leading reference in the field, explicitly requires that all plumbing and electrical hookups comply with OSHA, NFPA, and relevant local codes — and that the installer review the Certificate of Conformance for the specific meter’s rated pressure, temperature, and gas composition before installation.
From a mechanical safety standpoint, the supply line must be depressurized and purged with nitrogen before any meter installation or replacement work. Use of a manual isolation valve upstream of the meter is mandatory — both for installation safety and for the long-term in-situ calibration verification procedure that most quality meters support. Insertion meters with retractable probes should only be extracted and reinserted when the line is at a safe working pressure confirmed by the meter manufacturer’s specifications; attempting to retract an insertion probe at full operating pressure is a serious injury risk.
Documentation and Audit Trails for Inspections
Building code inspectors and energy auditors increasingly require documentation of installed metering: the meter’s model and serial number, its NIST-traceable calibration certificate, the as-installed wiring diagram, and the commissioning report. Creating this documentation file at installation — and storing it in the building’s maintenance log — saves significant time and cost when certification, lease renewal, or insurance review requires it. For ISO 50001-aligned facilities, this documentation is a certification audit requirement; for LEED and BREEAM certified buildings, metering commissioning records are a submittal prerequisite for the relevant energy metering credits.
Sizing and Placement Strategy
Monitoring Scope: Spot vs. Whole-Home vs. Sub-System
Before selecting a meter, define the monitoring scope. Three architectures serve different needs and budgets in a residential setting. A whole-home meter on the main gas entry point provides total consumption data but cannot distinguish between appliances — it cannot tell you whether the boiler or the cooktop is responsible for an unexpected consumption increase. A sub-system meter on each major appliance circuit (boiler, water heater, range) provides appliance-level resolution and enables efficiency comparisons between systems, but requires multiple meters and a data integration layer to aggregate the readings. A spot meter — a single portable thermal mass meter used for audit purposes, moved between circuits — is a cost-effective option for an initial energy baseline study, after which permanent metering can be focused on the highest-consumption or highest-risk circuits identified in the audit.
Sensor Placement Guidelines for Reliable Readings
The placement rule that professional installers violate most often — and that causes the greatest number of post-installation accuracy complaints — is the straight-run requirement. Thermal mass insertion meters require a minimum of 15 pipe diameters (15D) of unobstructed, straight pipe upstream and 5–8D downstream of the insertion point. In a residential utility room, where gas pipe runs are typically short and heavily interrupted by valves, bends, and appliance connections, achieving 15D is not always straightforward — but it is always worth solving before installation, rather than accepting a compromised reading location.
When 15D upstream is not physically available due to existing pipework layout, two solutions are available: install a tube-bundle flow conditioner immediately upstream of the meter (which compresses the effective straight-run requirement to approximately 3D + conditioner + 3D), or use a multi-point insertion probe that averages across multiple velocity measurement points across the pipe cross-section — reducing the sensitivity to flow profile distortion. Both options add cost, but both produce results that are significantly more reliable than simply installing the meter in a sub-optimal location and hoping for the best.

Interaction with Insulation, Vents, and Heat Sources
Thermal mass meters are sensitive to ambient temperature because their operating principle relies on a controlled temperature differential between the sensor and the gas. If the meter is mounted immediately downstream of a section of uninsulated pipe in a cold utility room, the gas arriving at the sensor is colder than the calibration reference temperature — introducing a systematic low-flow bias. Conversely, if the meter is mounted near a boiler flue or an uninsulated hot-water pipe, the elevated ambient temperature heats the probe pre-flow, reducing the sensor’s sensitivity at low flow rates. Best practice is to mount the meter on a section of pipe that has been at a stable, representative temperature for at least 30 minutes before taking a reading, and to ensure the pipe upstream of the meter is insulated to the same standard as the rest of the system.
Choosing a Reputable Supplier and Model
Manufacturer Reputation and Supported Hardware
The thermal mass meter market spans a wide range of quality tiers, and purchase price is a poor proxy for value when total cost of ownership is the correct metric. The most reliable way to assess a manufacturer is to ask for the following: NIST-traceable calibration certificates for the specific meter model (not just a general factory calibration statement), published accuracy specifications stated as % of reading across the full turndown range, a list of reference installations in comparable residential or light-commercial applications, and in-situ calibration verification capability — which means the meter can be checked against its factory baseline without removing it from the pipe.
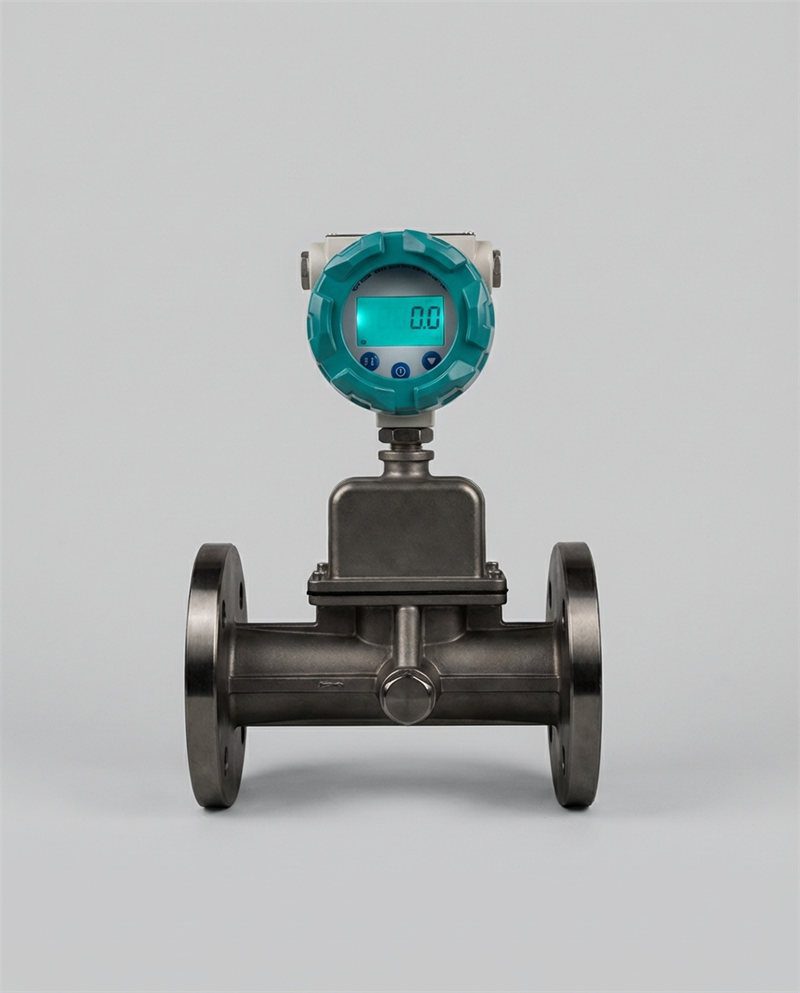
For residential and light-commercial projects, Jade Ant Instruments’ thermal mass flow meter range offers insertion and inline variants with configurable outputs (4–20 mA, Modbus RS485, HART) and a documented calibration programme — relevant for projects where long-term measurement traceability is required for energy certification or sub-metering billing. Their instruments cover pipe sizes from DN15 (½”) to DN300 (12″), which encompasses the full range of residential gas and HVAC air duct applications.
Firmware Updates, Customer Support, and Service Lifetime
Modern thermal mass meters are digitally driven instruments — their measurement algorithms, output configurations, and diagnostic thresholds are defined in firmware. A manufacturer that does not publish a firmware update history, or that charges for configuration changes after purchase, is a significant long-term support risk. Ask specifically: how are firmware updates delivered (field-portable programmer, USB, or remote update)? Is there a rollback procedure if an update causes unexpected behaviour? How long will spare parts and technical support remain available for the specific model? The answer should be a minimum of 10 years from the date of manufacture — matching the meter’s expected service life.
Cost vs. Performance Assessment and Total Cost of Ownership
The purchase price of a residential thermal mass meter — typically $400–$1,800 for an insertion-style unit in residential pipe sizes — is only one component of the true total cost of ownership (TCO). The following chart illustrates the 5-year TCO breakdown for a residential installation, based on published calibration service rates and typical installation labour costs:
📊 5-Year Total Cost of Ownership — Residential Thermal Mass Meter
Typical residential natural gas application, DN25 insertion meter. USD estimates based on 2025 market rates.Total 5-year TCO: approx. $1,850 · Annual cost equivalent: ~$370/year · Based on 2025 residential service rates (US market)
Installation Planning and Prerequisites
Required Tools, Equipment, and Safety Gear
A properly equipped installation team should arrive on-site with the following before any work begins on the gas system:
- Pipe thread sealant and isolation fittings rated for gas service (PTFE tape is not sufficient for threaded gas fittings above DN15 — use anaerobic thread sealant or approved compound)
- Pipe gauge and wall-thickness measurement tool — required to verify the correct insertion depth for the probe element relative to the pipe’s inside diameter
- Manometer or digital pressure gauge — to confirm the line has been successfully depressurized before tapping
- Nitrogen purge assembly — gas must be displaced from the work section before any pipe penetration; nitrogen is the safe purge medium for gas pipe in residential environments
- Calibrated torque wrench — meter fittings must be torqued to manufacturer specification; under- or over-torquing risks both leaks and probe damage
- Multimeter and current loop tester — for verifying 4–20 mA output and wiring integrity post-installation
- Gas leak detector (electronic or bubble solution) — mandatory leak check on all fittings before re-pressurizing to full working pressure
Personal Protective Equipment for Safe Handling
The PPE requirements for thermal mass meter installation on a residential gas line are determined by two hazard categories: mechanical hazards (pipe cutting, probe insertion, torquing under pressure) and electrical hazards (wiring the meter power supply and signal outputs). For mechanical work on gas pipe: gas-rated gloves, safety glasses, and steel-toed footwear are mandatory. For electrical work: insulated gloves rated for the supply voltage (at minimum Category II for residential 120/240V), insulated tools, and an arc-flash-rated face shield if working within 300 mm of live terminals. Clothing should be cotton or FR-rated — synthetic fabrics in the presence of even small gas concentrations represent an ignition risk.
Electrical Supply, Grounding, and Code Considerations
Most residential thermal mass meters require a 24 VDC or 110/240 VAC power supply. For safety-critical installations (gas-adjacent environments), a 24 VDC low-voltage supply is strongly preferred — eliminating the risk of AC mains voltage exposure in an environment where gas may be present during maintenance. The power supply circuit should be on a dedicated breaker, labelled on the distribution panel as “Gas Meter / Instruments,” and fitted with a lockout/tagout (LOTO) point to allow the meter to be de-energized safely for maintenance without affecting other appliances. Grounding of the meter body — per NEC Article 250 and NFPA 54 guidance — must establish continuity between the meter enclosure and the building ground. This is both a measurement quality requirement (eliminating electrical interference) and a safety requirement (preventing static accumulation in gas service).
Site Preparation, Access, and Mounting Considerations
Before installation day, confirm the following at site: the nominated meter location has adequate straight-run clearance (at least 15D upstream of the insertion point, measured from the nearest valve, elbow, or fitting); the pipe at the installation point is accessible from at least two sides for the insertion fitting; there is a clear cable route from the meter to the power supply and BMS connection point; and the meter can be reached comfortably by a standing adult for periodic inspection and calibration — meters installed in crawl spaces, behind services, or at heights above 2.5 m without fixed access will almost certainly be neglected during maintenance cycles.
This step-by-step field video from Industrial E&I Engineering covers the complete physical installation sequence for an insertion-type thermal mass flow meter — including pipe tapping, probe depth setting, fitting torque procedure, and initial power-on checks. Highly recommended viewing for installation teams before their first project.
Step-by-Step Installation Process
Pre-Install Checks and System Shutdown Procedures
Never begin installation on a live gas line. The pre-installation shutdown sequence for a residential gas meter installation must follow this order without exception:
Inform all building occupants that gas will be interrupted. Contact the local gas utility if the isolation point is upstream of the service meter — some jurisdictions require utility notification before any gas system work.
Close the isolation valve upstream of the planned installation point and confirm closure with the manometer (reading should drop to 0 mbar within 2–3 minutes of valve closure for a tight system). Open a downstream appliance briefly to vent residual pressure.
Displace the residual gas in the work section with dry nitrogen using the purge assembly. Purge until gas detector reading at the open end drops below 1% LEL (lower explosive limit). This prevents any ignition risk from a spark during pipe penetration.
Conduct a toolbox check against the prepared list. Attempting to improvise a tool mid-installation on a gas system is a safety incident waiting to happen. If any item is missing, close out the site and return when fully equipped.
Confirm the delivered meter’s gas type, operating pressure, and power supply specification match the Certificate of Conformance. Calibration errors will occur if a meter calibrated for a different gas composition or pressure range is installed without correction.
Mounting the Meter and Routing Sensors/Wiring
With the pipe safely isolated and purged, the mechanical installation sequence proceeds as follows. First, mark the pipe at the chosen insertion location — using a pipe square to ensure the mark is perpendicular to the pipe axis, which is critical for the probe to be inserted at 90° and read the true pipe centreline velocity. Drill or tap the insertion fitting hole per the meter manufacturer’s specified size; most residential insertion meters use a ¾” or 1″ NPT hot-tap fitting. Thread the fitting into the pipe using the appropriate sealant (not PTFE tape on NPT gas fittings above DN15 — use Loctite 577 or equivalent anaerobic sealant). Allow the sealant to cure to the manufacturer’s stated time before pressure testing.
Insert the probe to the manufacturer-specified insertion depth — typically to the pipe centreline for a single-point insertion meter. Mark the insertion depth on the probe shank with a permanent marker before final tightening. Never rotate the probe after insertion, as this misaligns the UPSTREAM marking relative to the flow direction and introduces systematic measurement error. The Sage installation manual is explicit on this point: rotating the probe after insertion can cause significant measurement errors that will not be apparent until commissioning.
Route signal and power cables in dedicated conduit, separated from gas pipework by at least 150 mm and from AC mains cables by at least 300 mm. Secure all cable runs with appropriate clamps at 500 mm intervals. If the cable run exceeds 30 m between the meter and the BMS/controller, use shielded twisted pair (STP) cable with the shield grounded at the controller end only — to prevent ground loops that inject noise into the 4–20 mA signal.
Wiring, Calibration, Commissioning, and Initial Testing
With the mechanical installation complete and all fittings verified leak-free (see commissioning section), connect power and signal wiring according to the manufacturer’s wiring diagram — always found on the inside of the terminal cover. Double-check polarity on DC supplies and correct pin assignment on Modbus connections before energizing. Power the meter and verify the display initializes without fault codes. For meters with Modbus output, use a Modbus RTU diagnostic tool or a laptop with appropriate software to confirm that all expected register values (flow rate, totalizer, temperature, diagnostic byte) are accessible at the expected slave address and baud rate.
Best Practices for Commissioning and Validation
Verifying Readings Against Baseline Measurements
The commissioning verification that most residential installations skip — and then spend months debugging — is the zero-flow check. With the isolation valve upstream of the meter closed and all downstream appliances off (confirmed zero flow condition), the meter should read 0.0 Nm³/h — within the manufacturer’s stated zero-stability specification. Any non-zero reading at confirmed zero flow indicates one of three problems: the probe orientation is incorrect, the pipe is not fully isolated (a valve is passing), or the meter has an electronic offset that requires zeroing through the transmitter menu. Resolving this before the system is returned to service takes 20 minutes; diagnosing it six months later after occupant energy complaints takes considerably longer.

Establishing a Reliable Baseline and Data Logging
The commissioning phase should include at least 72 hours of continuous data logging at the full operating conditions — capturing morning demand peaks (boiler startup), midday variable-load conditions, and overnight minimum-fire/standby periods. Review the logged data for the following patterns before signing off: the flow profile should show smooth ramp-up at boiler startup (sharp spikes may indicate valve cavitation), the overnight standby reading should be at or near zero (any residual flow indicates a valve not closing fully or a pilot flame that was not accounted for in the design), and the totalizer should increment consistently with the utility meter’s reading over the same period — typically within ±3% for a well-installed residential meter.
Documentation, Labelling, and Future Reference
A commissioning package for a residential thermal mass meter installation should include: the meter’s model number, serial number, and calibration certificate reference; the as-installed insertion depth measurement; the wiring diagram with terminal designations marked; the zero-flow reading recorded during commissioning (this becomes the reference for future in-situ calibration checks); the 72-hour baseline data log (as a CSV or PDF export from the BMS or data logger); and photographs of the final installation showing the meter orientation, upstream straight run, and cable routing. Store this package with the building maintenance records — ideally in a digital asset management system accessible to future maintenance personnel.
Safety Tips and Troubleshooting
Personal Protective Equipment and Safe Handling
The PPE requirements described in Section 6 remain in force for all post-installation maintenance activities. Gas-adjacent work — probe extraction for cleaning, fitting replacement, pressure testing — requires the line to be isolated and purged before any fitting is loosened, every time, without exception. A technician who has successfully serviced a meter 10 times under live pressure without incident has not proven it is safe; they have simply been lucky 10 times. The gas-pipe casualty statistics from HSE (UK), OSHA (US), and similar regulatory bodies consistently show that the majority of residential gas incidents involve experienced tradespeople who deviated from safe work procedures under time pressure — not novices who did not know the rules.
Common Installation and Operation Issues and Fixes
🥧 Root Causes of Thermal Mass Meter Accuracy Issues (Post-Installation)
Based on aggregated field service data from multiple TMM manufacturers and installation audits (2022–2025)The most common post-installation issue — accounting for 36% of field service calls across the thermal mass meter industry — is insufficient straight-run pipe upstream of the meter. The symptom is a reading that is systematically high or low compared to the utility meter’s accumulated total, with no obvious fault code from the meter itself. The fix is to either relocate the meter to a section with adequate straight run, or install a flow conditioner upstream of the current location. Neither fix is trivial once the meter is installed and commissioned — which is why correct placement before installation is so important.
Sensor contamination — typically condensed water or compressor oil carryover in gas lines — accounts for 19% of issues. The symptom is a gradual drift in zero reading (the meter reads a small positive flow even at confirmed zero flow) or a reduced sensitivity at low flows. The fix is to remove the probe, clean the sensor element with IPA (isopropyl alcohol) or the manufacturer-specified solvent, air-dry for 30 minutes, reinstall, and re-verify the zero reading. Preventing contamination through an inline coalescing filter and desiccant dryer upstream of the meter is far more cost-effective than repeated cleaning interventions.
When to Call a Licensed Professional
The following situations require a licensed gas or electrical contractor, regardless of the in-house team’s general competence:
- Any work on pipework upstream of the utility service meter, or involving the utility’s isolation valve
- Installation in a classified hazardous area (any enclosed space where gas concentration could reach 25% of LEL during normal or fault conditions)
- Any pipe tapping or hot-tap work at operating pressure above 100 mbar
- Any electrical connection to mains voltage (120/240V) within 2 m of gas pipework
- Any situation where a gas leak is detected during installation, commissioning, or maintenance — the area must be ventilated, all ignition sources removed, and a licensed Gas Safe / equivalent-registered engineer called before work resumes
Maintenance, Upgrades, and Life Cycle
Routine Maintenance Schedule and Visual Inspections
A thermal mass meter with no moving parts and a quality sensor element has an inherently low maintenance burden — but “low” does not mean “zero.” The following schedule represents industry best practice for a residential gas application, aligned with ISO 9001 calibration management requirements and manufacturer guidance from leading instrument suppliers:
| Interval | Task | Who Performs | What to Document |
|---|---|---|---|
| Monthly | Visual inspection: check for corrosion on fittings, cable damage, display legibility, and absence of fault codes | Building maintenance staff | Photo log, fault code history export |
| Quarterly | Data quality review: compare meter totalizer against utility bill for same period. Deviation >±5% triggers investigation. | Energy manager / facilities engineer | Comparison report with utility data |
| Annually | In-situ zero-flow calibration check: isolate line, confirm zero-flow condition, verify meter reads 0.0 ± spec. If outside spec: clean sensor, re-verify. If still outside: initiate recalibration. | Qualified instrument technician | Zero-flow reading vs. commissioning baseline; calibration check certificate |
| Annually | Sensor visual inspection for contamination and probe seal integrity check | Qualified instrument technician | Sensor condition photo; seal integrity test result |
| Every 2–3 years | Sensor cleaning (IPA/manufacturer solvent) even if zero-flow check passes — preventive maintenance against gradual contamination buildup | Qualified instrument technician | Cleaning service record; before/after zero reading |
| Every 3–5 years | Full factory recalibration (or NIST-traceable in-situ calibration if instrument supports it) | Manufacturer / accredited calibration lab | Calibration certificate with NIST traceability statement |
Software/Firmware Update Protocols and Rollback Planning
Firmware updates for digital thermal mass meters are typically released every 12–24 months, addressing measurement algorithm improvements, output format updates for BMS compatibility, and diagnostic enhancements. The update procedure varies by manufacturer: some support field updates via a handheld programmer or laptop USB connection; others require the unit to be returned to the factory or a certified service centre. Before applying any firmware update to a meter in live service, review the release notes for any changes to default output scaling or zero-point algorithm — these changes can cause a step-change in the meter’s reported readings that will appear to the BMS as a sudden change in gas consumption, triggering false alarms or incorrect billing adjustments. Always maintain the previous firmware version image for rollback, and schedule updates during planned maintenance windows rather than on live-running systems.
End-of-Life, Replacement Intervals, and Data Migration
A well-maintained thermal mass meter in a residential gas application can deliver 15+ years of reliable service — but the data ecosystem around it (BMS platform, cloud energy dashboard, calibration management software) may change significantly over that time. At end-of-life replacement, the most commonly underestimated task is data migration: transferring the accumulated totalizer history, calibration records, and alarm event logs to the replacement instrument’s documentation file. This historical data is essential for long-term energy performance tracking and for demonstrating compliance with energy certification requirements that span multiple instrument generations. Build the data export and archival step explicitly into your end-of-life replacement procedure — and verify that your BMS platform can export historical data in an open format (CSV, XML, or JSON) that will remain readable after the BMS itself is upgraded.

Implementation Checklist: From Selection to Live Commissioning
Use the following checklist as a project control document for each thermal mass meter installation. Each item should be signed off by the responsible party before the project moves to the next phase.
| # | Checklist Item | Responsible Party | Status |
|---|---|---|---|
| 1 | Gas type, composition, operating pressure, and temperature confirmed | Design engineer | Pre-Purchase |
| 2 | Flow range (min/max) calculated; turndown ratio verified against meter spec | Design engineer | Pre-Purchase |
| 3 | Output protocol (4–20 mA / Modbus / M-Bus) confirmed against BMS | Controls engineer | Pre-Purchase |
| 4 | IP rating confirmed for installation environment | Design engineer | Pre-Purchase |
| 5 | Building permit obtained (gas and electrical) | Project manager | Pre-Install |
| 6 | Straight-run pipe clearance measured and confirmed ≥15D upstream | Installation team | Pre-Install |
| 7 | PPE assembled and verified (gas gloves, insulated tools, arc shield, gas detector) | Installation team | Pre-Install |
| 8 | Line isolated, depressurized, and nitrogen-purged | Licensed gas contractor | Instalación |
| 9 | Insertion fitting installed and sealant cured per manufacturer spec | Licensed gas contractor | Instalación |
| 10 | Probe inserted to correct depth; UPSTREAM mark facing upstream; orientation photo taken | Installation team | Instalación |
| 11 | All gas fittings leak-tested with gas detector — ZERO leaks before re-pressurization | Licensed gas contractor | Instalación |
| 12 | Power and signal wiring completed per wiring diagram; shield grounded at controller end only | Licensed electrician | Instalación |
| 13 | Zero-flow check performed and recorded | Instrument technician | Commissioning |
| 14 | BMS data integration verified — all registers readable, engineering units correct | Controls engineer | Commissioning |
| 15 | 72-hour data log captured and reviewed; no anomalies present | Energy manager | Commissioning |
| 16 | Commissioning package filed (certificate, wiring diagram, baseline log, photos) | Project manager | Commissioning |
A Well-Installed Meter Pays for Itself
A thermal mass meter selected and installed to the standards described in this guide will deliver 15+ years of accurate, reliable gas consumption data at a total cost of ownership that is measured in dollars per day — a fraction of the energy cost visibility it enables. The critical decisions are not hardware decisions: they are engineering decisions about where to place the meter, how to prepare the pipe system, how to commission the instrument correctly, and how to build a maintenance programme that keeps it accurate for the full service life.
The industry data is consistent: over 60% of thermal mass meter performance issues trace back to installation errors that were entirely preventable. The checklist in this guide exists to close that gap systematically — giving residential building contractors, facilities engineers, and energy managers a repeatable, auditable process for getting installations right the first time.
For project teams ready to specify instruments, the Jade Ant Instruments thermal flow meter product range covers DN15 to DN300 pipe sizes with configurable Modbus, 4–20 mA, and HART outputs — making it straightforward to match an instrument to a specific residential application and integrate it into almost any BMS platform. Their flow meter installation best practices guide provides additional technical depth for complex piping configurations and multi-meter deployments.
For further reading on commissioning standards and energy management framework requirements, the ISO 50001 energy management guide from Sage Metering and the IEA’s Energy Efficiency 2025: Buildings report provide authoritative context on the regulatory environment driving demand for precision residential gas metering worldwide.
Preguntas frecuentes
The following questions address the most common technical, safety, and practical queries from building contractors, homeowners, and facilities engineers considering thermal mass meter installation in a residential context.
Further Reading and Technical Resources
- Jade Ant Instruments — Top 10 Thermal Mass Flow Meter Brands Compared (2025) — independent specification comparison across major manufacturers
- Jade Ant Instruments — Flow Meter Installation Best Practices Guide — comprehensive technical guide covering straight-run, orientation, grounding, and commissioning across all meter types
- Sensirion — Thermal-Mass Gas Metering: Proven for Years, Certified for the Future — 10-year field performance study of thermal-mass meters in residential gas networks
- BJSSAE — Thermal Mass Flow Meter Installation Guidelines — practical installation guidance with pipe diameter and straight-run reference data
- Zero Instrument — The Importance of Grounding a Mass Flow Meter — technical explanation of grounding requirements and consequences of omission
- Aister Instrument — How to Calibrate a Thermal Mass Flow Meter: Step-by-Step Guide — field calibration procedure reference