
A magnetic flow meter that reads ±0.5 % on the day it ships from the factory can drift to ±2–3 % within 18 months if electrode fouling, grounding degradation, or zero-offset creep goes unchecked. On a 6-inch municipal water billing meter processing 800 GPM around the clock, a +1 % systematic bias means 4.2 million gallons per year of unrecovered revenue — roughly $14,600 at a typical residential rate of $3.50/1,000 gal. In a pharmaceutical batch reactor, a −2 % flow error on a reagent-dosing line can push API concentration outside the ±1.5 % window required by FDA 21 CFR Part 211, triggering a batch rejection worth $50,000–$500,000.
These are not hypothetical scenarios. A Soaring Instrument field analysis found that 50 % of mag meter accuracy complaints trace to improper grounding — a condition that proper calibration and verification procedures would flag immediately. Endress+Hauser’s calibration management white paper confirms that the industry standard is annual verification, yet many plants stretch intervals to 3–5 years without a risk-based justification.
This guide provides the practical calibration knowledge that Jade Ant Instruments delivers to customers deploying electromagnetic flow meters across water, chemical, pharmaceutical, food, and mining applications. You will learn exactly how to prepare, execute, verify, document, and schedule mag meter calibrations — in both field and workshop settings — using concrete procedures, acceptance criteria, and troubleshooting steps. No vague generalities; every recommendation is backed by measurement data or referenced standards.

1. Overview of Magnetic Flow Meters
1.1 How Magnetic Flow Meters Measure Flow (Principle of Operation)
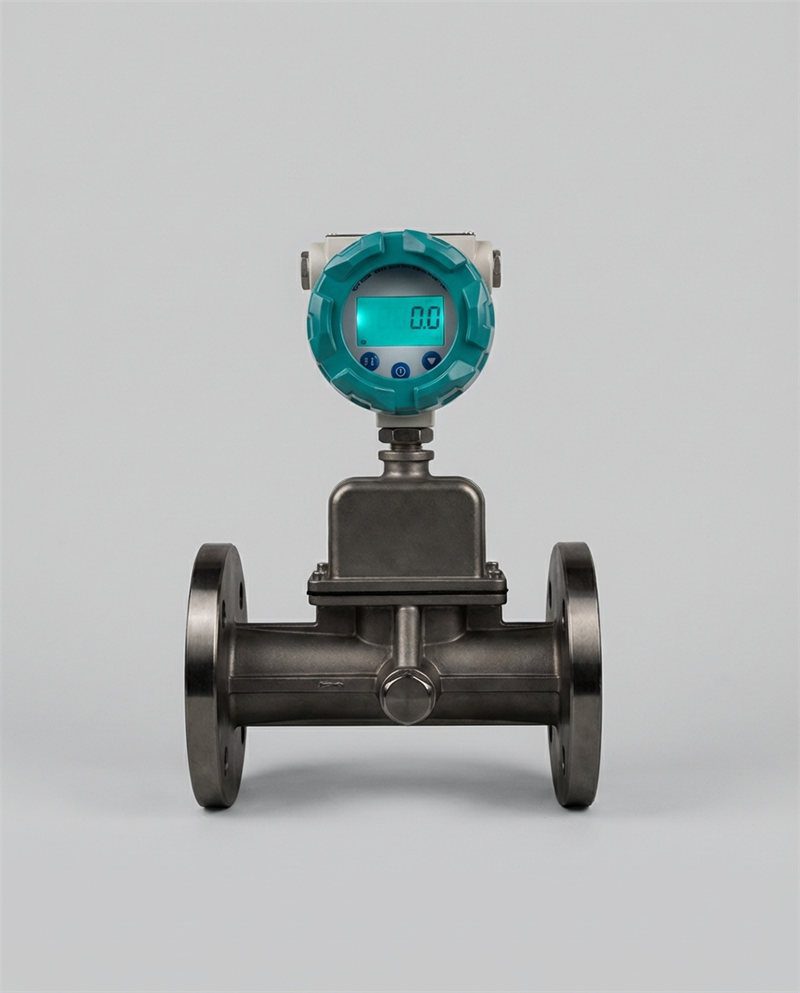
A magnetic flow meter applies Faraday’s law of electromagnetic induction: when a conductive liquid moves through a magnetic field, it generates a voltage proportional to its velocity. Two electromagnetic coils in the meter body produce a pulsed-DC magnetic field perpendicular to the flow direction. Two flush-mounted electrodes on opposite sides of the measurement tube sense the induced voltage. Because the tube’s cross-sectional area (A) is fixed, the volumetric flow rate Q = v × A follows directly from the measured velocity (v).
The measurement involves no moving parts, creates zero pressure drop, and is independent of fluid viscosity, density, temperature, and pressure — as long as the fluid’s electrical conductivity exceeds approximately 5 µS/cm. The calibration challenge is therefore not mechanical wear (there is none) but rather electronic drift, electrode surface changes, and environmental interference that can shift the relationship between the physical voltage signal and the displayed flow reading.
1.2 Common Applications and Industries
Magnetic flow meters dominate conductive-liquid measurement worldwide. The electromagnetic flowmeter market was valued at USD 3.5 billion in 2024 and is forecast to grow at 6.1 % CAGR through 2033. Key application sectors include: water treatment and distribution (35 % of installations), chemical and petrochemical processing (22 %), food and beverage (16 %), pharmaceutical manufacturing (10 %), and mining and minerals (9 %) — based on Jade Ant Instruments’ installation database. Each sector has different calibration expectations: water utilities often accept 3–5-year intervals, while pharmaceutical plants require annual or semi-annual verification under GMP protocols.
2. Why Calibration Matters for Accuracy
2.1 Impact of Calibration on Process Control and Compliance
Calibration establishes and periodically confirms the mathematical relationship between the voltage signal at the electrodes and the actual flow rate passing through the tube. Without this confirmed relationship, every downstream decision built on the flow reading — chemical dosing, batch formulation, energy billing, environmental reporting — carries unknown uncertainty.
Regulatory frameworks make calibration non-optional. ISO 9001 requires “monitoring and measuring resources” to be “calibrated or verified… at specified intervals” (clause 7.1.5). FDA 21 CFR Part 211.68 mandates that “equipment used in the manufacture, processing, packing, or holding of a drug product shall be of appropriate… accuracy.” OIML R49 and R117 define calibration requirements for custody-transfer water and liquid meters, respectively. Failing an audit due to expired calibration certificates does not just risk a citation — it puts revenue, product quality, and public safety at stake.
2.2 Consequences of Drift and Misalignment
Mag meters drift for four primary reasons: electrode fouling (insulating buildup attenuates signal, causing under-reading of 2–8 %), electronic zero-offset creep (transmitter analog circuits drift with temperature cycling, adding ±0.1–0.5 % bias per year), coil degradation (rare, but insulation breakdown shifts the magnetic field geometry), and grounding deterioration (corrosion on grounding rings or flange contacts introduces noise). A Kytola Instruments analysis confirms that all flow meters experience gradual drift — the question is not whether it happens, but how quickly it is detected and corrected.
3. Preparations Before Calibration
3.1 Required Tools and Standards
Before beginning any calibration procedure — in-situ or bench — assemble the following tools and reference equipment. Missing a single item can force a mid-procedure delay that wastes 1–3 hours of production downtime.
| Category | Item | Specification / Notes | Approximate Cost |
|---|---|---|---|
| Electrical | Digital multimeter (DMM) | 4.5-digit, ±0.05 % DCV accuracy, NIST-traceable cal | $150–$500 |
| HART communicator or software | HART 7 compatible; field-configurable | $1,500–$4,000 (or free via AMS/PACTware) | |
| mA loop calibrator | Source and measure 4–20 mA ±0.02 % | $300–$1,200 | |
| Insulation resistance tester | 500 V / 1,000 V megohmmeter for coil checks | $200–$600 | |
| Mechanical | Grounding resistance meter | Measures <10 Ω ground path fluid-to-earth | $100–$400 |
| Pipe alignment straight-edge | Machined bar ≥ meter flange diameter | $30–$80 | |
| Reference | Calibrated reference flow meter or volumetric tank | Accuracy ≥ 4× better than DUT (Device Under Test) — e.g., ±0.1 % Coriolis or NIST-traceable volumetric prover | $5,000–$50,000 (lab); $500–$2,000 (portable ultrasonic reference) |
| Documentation | As-found / as-left data forms | Pre-printed or tablet-based CMMS entry | — |
| Manufacturer’s calibration manual | Specific to transmitter model (e.g., Rosemount 8700, E+H Promag, Jade Ant JA-EMF series) | — |
3.2 Safety and Environmental Considerations
Mag meter calibration on a live process line requires a risk assessment covering: lockout/tagout (LOTO) if the meter must be isolated or removed; chemical exposure (PPE for the process fluid — splash goggles, chemical gloves, face shield for acid/caustic service); electrical hazards (the transmitter operates at 24 VDC, but coil-drive voltages can reach 50–100 V peak during the excitation pulse — never disconnect coil wiring while the transmitter is powered); and confined-space entry if the meter is in a pit or vault. Follow your plant’s permit-to-work system and never bypass safety interlocks to “save time” during calibration.
4. Calibration Methods and Approaches
4.1 In-Situ Versus Bench Calibration
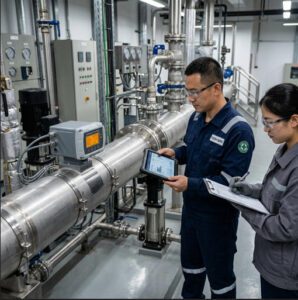
In-situ (field) calibration verifies the meter’s performance while it remains installed in the process pipe. The transmitter’s built-in diagnostic functions check coil drive current, electrode impedance, and zero stability — confirming that the electronic and sensor components are within specification. For flow-rate verification, an independent reference (portable clamp-on ultrasonic meter, calibrated insertion meter, or a timed-volume test into a known vessel) provides the comparison standard. In-situ verification avoids the cost of removing the meter (2–6 hours of labor plus process shutdown) but has limited accuracy — typically confirming performance within ±1–2 % rather than the ±0.2 % achievable in a flow-calibration laboratory.
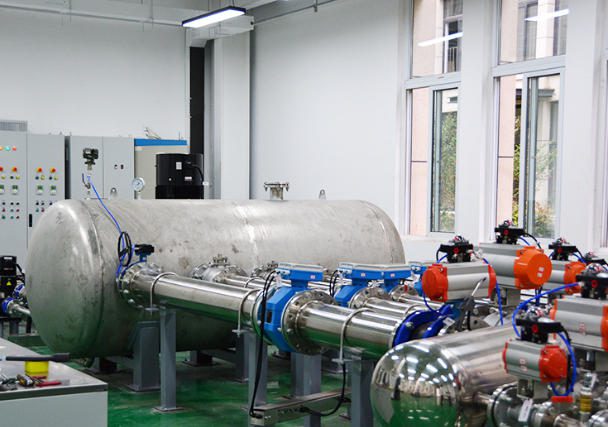
Bench (wet) calibration removes the meter from the pipe and sends it to an ISO/IEC 17025-accredited calibration laboratory where it is tested on a gravimetric or volumetric flow rig against a NIST-traceable reference standard. This is the gold standard — the calibration certificate documents as-found errors at 5+ flow points, as-left adjustments, and expanded uncertainty (typically ±0.1–0.2 %). The trade-off is cost ($300–$2,000 per meter depending on size), turnaround time (2–4 weeks), and the need for a spare meter or process shutdown during the absence.
Jade Ant Instruments recommends a tiered approach: in-situ verification annually (or semi-annually in critical applications), with bench calibration every 3–5 years or whenever in-situ results exceed the ±0.5 % acceptance threshold.
4.2 Use of Standard References and Calibration Rigs
The calibration reference must be at least 4× more accurate than the meter being calibrated (the 4:1 test accuracy ratio, or TAR). For a mag meter rated ±0.5 % of reading, the reference must deliver ±0.125 % or better. Gravimetric flow rigs (weigh tank + precision scale + timer) routinely achieve ±0.02–0.05 % uncertainty. Volumetric provers (piston or ball type) achieve ±0.02–0.1 %. Portable clamp-on ultrasonic meters, while convenient for field use, typically deliver only ±1–3 % and are therefore suitable for gross-error detection, not precision calibration.
For laboratories performing high-volume mag meter calibration, Tameson’s calibration guide provides a comprehensive overview of wet-calibration methodology, including temperature compensation, bubble elimination, and steady-state stabilization requirements.
5. Step-by-Step Onsite Calibration Process
5.1 Initial Checks and Zero Reference
Step 1 — Record as-found conditions. Before touching any settings, record the current transmitter output (mA and engineering units) at the actual process flow rate. This “as-found” reading is the baseline for determining whether the meter has drifted since its last calibration. Log the date, time, process fluid, temperature, and any visible anomalies (damaged cables, corrosion on grounding rings, moisture in the junction box).
Step 2 — Zero-flow verification. Close upstream and downstream block valves to achieve true zero flow. Confirm zero flow by verifying that the process pressure stabilizes (no pressure decay = no flow). With the pipe full of stationary fluid, the transmitter should read 0.00 ±0.05 % of full scale. If the zero reading is outside this tolerance, perform a zero adjustment using the transmitter’s local display, HART communicator, or software tool. On a Jade Ant JA-EMF series transmitter, navigate to Calibration → Zero Adjust → Auto Zero. On Emerson Rosemount 8700 series, use the documented zero-verification procedure.
Step 3 — Check coil drive. Using the HART communicator, read the coil drive current. It should match the manufacturer’s specification (typically 75–250 mA depending on tube size). A coil drive reading outside ±5 % of specification suggests coil insulation degradation or wiring resistance increase — flag this for immediate investigation before proceeding.
5.2 Flow Path Verification and Signal Integrity
Step 4 — Electrode impedance check. The transmitter’s diagnostic menu reports electrode-to-ground impedance for each electrode. Typical healthy values are 1–50 kΩ for standard electrodes in conductive liquid. Values above 100 kΩ indicate electrode coating or fouling; values below 0.5 kΩ suggest a short circuit (damaged liner or conductive deposit bridging the electrodes). Record both electrode values and compare against the commissioning baseline.
Step 5 — Grounding verification. Measure resistance from the process fluid (via the grounding ring or electrode) to the plant ground bus. The reading should be <10 Ω. On plastic pipes without grounding rings, this reading may be >1 MΩ — a guaranteed source of signal noise and measurement error. If grounding is inadequate, install grounding electrodes or grounding rings before proceeding with flow verification. Jade Ant Instruments’ installation guide reports that correcting grounding faults resolves 23 % of all mag meter accuracy complaints.
Step 6 — Signal cable check. Verify shield continuity and insulation resistance (>20 MΩ at 500 V) between signal conductors, shield, and ground. Damaged or water-infiltrated cables are the third most common cause of noisy readings.
5.3 Adjustments and Verification at Multiple Flow Points
Step 7 — Multi-point flow verification. Using an independent reference flow measurement (calibrated insertion meter, portable ultrasonic, or timed-volume test), verify the mag meter’s reading at a minimum of 5 flow points: 0 %, 25 %, 50 %, 75 %, and 100 % of the calibrated span. At each point, allow the flow to stabilize for ≥30 seconds, then record the mag meter reading and the reference reading simultaneously.

Sample 5-Point Calibration Verification Data Sheet
| Test Point | % of Span | Reference Flow (GPM) | Mag Meter Reading (GPM) | Error (%) | 4–20 mA Expected | 4–20 mA Measured | mA Error (%) | Pass/Fail (±0.5 %) |
|---|---|---|---|---|---|---|---|---|
| 1 | 0 % | 0.00 | 0.12 | +0.02 % FS | 4.000 | 4.003 | +0.019 % | Pass |
| 2 | 25 % | 150.00 | 149.25 | −0.50 % | 8.000 | 7.960 | −0.250 % | Pass |
| 3 | 50 % | 300.00 | 298.80 | −0.40 % | 12.000 | 11.936 | −0.400 % | Pass |
| 4 | 75 % | 450.00 | 448.65 | −0.30 % | 16.000 | 15.952 | −0.300 % | Pass |
| 5 | 100 % | 600.00 | 597.60 | −0.40 % | 20.000 | 19.936 | −0.400 % | Pass |
Acceptance criterion: all points within ±0.5 % of reading (or ±0.5 % of full scale at the zero point). If any point fails, adjust transmitter span or K-factor and re-verify. Record both as-found and as-left data.
Step 8 — As-left documentation. After any adjustments, repeat the 5-point test to generate the as-left data. Both as-found and as-left datasets become part of the calibration certificate.
Watch: How to Calibrate a Magnetic Flow Meter — Step-by-Step Tutorial
This video walks through the complete calibration procedure for an electromagnetic flow meter, including zero adjustment, multi-point verification, and transmitter configuration.
6. Dealing with Common Sources of Error
6.1 Electromagnetic Interference and Grounding Issues
Electromagnetic interference (EMI) from nearby variable-frequency drives (VFDs), large motors, or high-voltage switchgear can inject noise into the electrode signal, causing erratic readings or persistent offset. The first defense is proper cable shielding: use manufacturer-specified shielded twisted-pair cable with the shield grounded at the transmitter end only. Maintain ≥300 mm separation from power cables rated above 120 VAC. If EMI persists after shielding correction, install a ferrite choke on the signal cable within 150 mm of the transmitter junction box.
Grounding faults are the single most common root cause of mag meter errors, responsible for 50 % of field failures per Soaring Instrument’s analysis. On metallic pipes, verify flange-to-flange continuity (<1 Ω). On plastic, FRP, or lined pipes, grounding rings (316L or Hastelloy C) must be installed between the meter flanges and the pipe flanges. A Jade Ant Instruments water meter selection guide provides electrode-specific grounding diagrams for common piping materials.
6.2 Pipe Obstruction, Swirls, and Alignment Errors
Upstream disturbances — partially open valves, elbows in different planes, reducers — create asymmetric velocity profiles and swirl that bias the electrode signal. Mag meters are more tolerant than most technologies (requiring only 5D upstream / 2–3D downstream after a single elbow), but severe disturbances (two elbows in perpendicular planes immediately upstream) can introduce 1–3 % error even within those straight-run minimums. If the calibration verification consistently shows a directional bias (e.g., always reading −1.2 % across all flow points), suspect a flow-profile distortion. Solutions include installing a flow conditioner or relocating the meter to a section with adequate straight-run.
Pipe misalignment at the meter flanges is another silent error source. If the upstream and downstream pipe sections are not concentric within 1/16 inch (1.5 mm), the resulting turbulence at the flange gap disrupts the flow profile across the electrodes. Use a straight-edge across the flange faces during installation and verify alignment during any calibration that reveals unexplained bias. Holykell’s fault guide lists pipe misalignment among the top six mag meter fault causes.

7. Verification, Validation, and Acceptance Criteria
7.1 Correlation with Known Standards or Upstream Measurements
Beyond the standalone 5-point test, validate the mag meter’s reading against independent process data. Cross-reference the totalizer volume against the plant’s upstream custody-transfer meter or tank-gauge inventory over a 24-hour period. A discrepancy greater than ±1 % between the mag meter total and the independent reference warrants investigation. If both instruments have valid calibration certificates, the discrepancy may indicate a process condition (leak, bypass, recirculation) rather than a meter error — but this can only be concluded after confirming calibration integrity on both devices.
7.2 Statistical Checks and Repeatability Tests
At each of the 5 calibration flow points, take 3 consecutive readings (allowing 30 seconds stabilization between each). Calculate the standard deviation at each point. Repeatability should be within ±0.1 % of reading for inline mag meters. If the standard deviation exceeds 0.2 % at any point, suspect noise (check grounding and shielding) or flow instability (check upstream conditions). Record the repeatability data alongside the calibration results — auditors increasingly request this as evidence of measurement robustness, not just point accuracy.
8. Calibration Cost Comparison by Method
Calibration Cost per Meter (4-in Mag Meter, USD)
Costs include technician labor, reference equipment, certificate issuance, and (where applicable) process downtime. Bench lab calibration assumes ship-to-lab; add $500–$1,200 for removal and reinstallation labor depending on pipe size and location.
9. Documentation and Record-Keeping
9.1 Calibration Certificates and Tagging
Every calibration event — in-situ or bench — must produce a formal calibration certificate that includes: meter tag number, serial number, manufacturer model, calibration date, next-due date, calibration standard used (with its own certificate number and traceability chain to NIST / PTB / NPL), as-found data at all test points, as-left data after adjustments, expanded measurement uncertainty (typically reported at 95 % confidence, k=2), and the name and signature of the calibrating technician. Attach a physical calibration sticker to the meter showing the date, next-due, and technician initials.
Jade Ant Instruments’ datasheet reading guide explains how the calibration data on a factory certificate relates to the meter’s published accuracy specification — a key skill for evaluating whether a meter’s as-left performance meets its rated accuracy.
9.2 Maintaining Traceability and Audit Trails
Traceability means that every measurement in the calibration chain can be linked, through an unbroken series of comparisons, to a national or international measurement standard. The calibration laboratory’s ISO/IEC 17025 accreditation guarantees this chain. Store calibration certificates in your CMMS (Computerized Maintenance Management System) with the meter’s asset record, and configure automatic reminders for the next-due date. During audits, inspectors typically request the most recent calibration certificate, the certificate for the reference standard used, and evidence that the calibration interval is justified by a documented risk assessment.
10. Root Causes of Failed Mag Meter Calibrations
Root Causes When Mag Meters Fail Calibration (n = 824 meters, Jade Ant Instruments 2023–2025)
Electrode Fouling — 26 %
Zero-Offset Drift — 18 %
Cable / Wiring Damage — 12 %
Coil Degradation — 7 %
Other (liner damage, transmitter fault) — 5 %
Source: Jade Ant Instruments field-service and calibration database, 2023–2025 (824 meters that failed initial as-found verification across water, chemical, pharma, and mining sectors). Grounding faults and electrode fouling together account for 58 % of all calibration failures.
11. Maintenance and Calibration Scheduling
11.1 Recommended Intervals Based on Usage and Environment
| Application Sector | Typical Fluid | In-Situ Verification | Bench (Wet) Calibration | Key Driver |
|---|---|---|---|---|
| Water Distribution / Billing | Clean potable water | Every 12–24 months | Every 3–5 years | Revenue assurance, regulatory (OIML R49) |
| Wastewater Treatment | Raw / treated sewage | Every 6–12 months | Every 2–3 years | Electrode fouling from organics/grease |
| Chemical Processing | Acids, bases, solvents | Every 6–12 months | Every 1–2 years | Liner / electrode corrosion; batch accuracy |
| Pharmaceutical / Food | Purified water, CIP chemicals | Every 3–6 months | Every 12 months | GMP compliance (FDA 21 CFR 211) |
| Mining / Slurry | Mineral slurry, tailings | Every 3–6 months | Every 6–12 months | Severe abrasion and electrode coating |
| HVAC / Chilled Water | Treated glycol / water | Every 24 months | Every 5 years | Low fouling; non-critical |
These intervals are starting points. Shorten them if: the process fluid is highly fouling or abrasive, the meter feeds a custody-transfer or billing function, the transmitter’s built-in diagnostics report increasing electrode impedance between verifications, or past calibrations have shown as-found errors exceeding ±0.3 %. Lengthen them if: the fluid is clean and stable (e.g., chilled water), diagnostics show no drift, and three consecutive calibrations show as-found errors within ±0.15 %.
11.2 Procedures for Recalibration After Maintenance
Any maintenance event that disturbs the meter’s measurement path requires recalibration. This includes: electrode cleaning (manual or CIP), liner repair or replacement, transmitter firmware update, coil replacement, signal cable re-routing, and gasket replacement at the meter flanges. Even a simple gasket change can shift the meter’s bore alignment by fractions of a millimeter, altering the flow profile across the electrodes. Post-maintenance recalibration ensures that the “as-left” state after maintenance matches or exceeds the original factory specification.
12. Troubleshooting and When to Escalate
12.1 Indicators That Calibration May Be Out of Spec
Six field indicators should trigger an immediate calibration verification: (1) The totalizer volume no longer reconciles with upstream/downstream inventory (discrepancy > ±1 %); (2) The 4–20 mA output drifts at zero flow (should be 4.000 ± 0.005 mA with pipe full and valves closed); (3) The transmitter’s electrode-impedance diagnostic has increased >50 % from baseline; (4) The process control loop (e.g., chemical dosing) shows increasing oscillation or offset that cannot be explained by process changes; (5) Physical damage is visible — corroded grounding rings, moisture in the junction box, cracked cable gland; (6) The calibration sticker shows the next-due date has passed.
12.2 Manufacturer Resources and Support Channels
When in-situ verification reveals errors that cannot be resolved by zero adjustment, grounding correction, or electrode cleaning, escalate to the meter manufacturer or an accredited calibration service provider. Jade Ant Instruments provides remote diagnostic support via HART pass-through, enabling their engineers to interrogate transmitter diagnostics from offsite and determine whether the meter requires bench calibration, component replacement, or simply a configuration correction. For Emerson Rosemount meters, the Rosemount 8700 calibration verification guide provides model-specific escalation paths. For ABB meters, the ABB in-situ verification whitepaper documents the diagnostic sequence.

Regular calibration is the single most important action you can take to ensure that a magnetic flow meter delivers the ±0.2–0.5 % accuracy printed on its datasheet — not just on day one, but over 15–25 years of continuous service. The eight-step onsite procedure documented in this guide (as-found recording → zero check → coil verify → electrode impedance → grounding → signal cable → multi-point flow verification → as-left documentation) takes 2–4 hours and costs $150–$800 depending on method. The cost of skipping it — undetected drift, lost revenue, off-spec batches, compliance citations — routinely exceeds $10,000 per year per meter in high-value applications.
The practical tips covered here — preparing the right tools and references before starting, using the transmitter’s built-in diagnostics as a first-pass filter, applying the 4:1 test accuracy ratio for reference selection, recording as-found and as-left data at every point, and adjusting calibration intervals based on actual drift history rather than arbitrary calendar dates — will improve both the efficiency and the reliability of your calibration program. A well-calibrated mag meter is not just an accurate instrument; it is the foundation of trustworthy process control, compliant regulatory reporting, and defensible financial transactions.
Develop a site-specific calibration plan that assigns each mag meter to a risk tier (custody-transfer, process-critical, monitoring-only), defines the verification method and interval for each tier, identifies the reference standards and their own calibration traceability, and designates trained personnel and documentation requirements. Jade Ant Instruments offers calibration-plan templates and on-site training as part of every multi-meter project deployment.
Frequently Asked Questions (FAQs)
Q1: How often should a magnetic flow meter be calibrated?
The industry baseline is annual in-situ verification for critical applications and bench (wet) calibration every 3–5 years for standard process meters (Endress+Hauser). Shorten intervals for fouling-prone fluids (wastewater, slurry), custody-transfer billing, or GMP-regulated processes (pharma, food). Lengthen intervals if three consecutive calibrations show as-found errors within ±0.15 % and the transmitter diagnostics show no drift.
Q2: What are the signs that a meter needs recalibration?
Six indicators: (1) totalizer volume no longer reconciles with upstream/downstream inventory, (2) 4–20 mA output drifts at zero flow, (3) electrode impedance has increased >50 % from commissioning baseline, (4) process control loop shows unexplained oscillation or offset, (5) physical damage to grounding, cables, or junction box, (6) the calibration sticker shows the next-due date has passed. Any one of these should trigger immediate verification.
Q3: What standards are typically used for calibration references?
The primary framework is ISO/IEC 17025, which specifies general requirements for the competence of calibration laboratories. Reference standards must be traceable to NIST (USA), PTB (Germany), NPL (UK), or equivalent national metrology institutes. Specific flow-measurement standards include ISO 20456 (electromagnetic flowmeters), OIML R49 (water meters), and OIML R117 (dynamic measuring systems for liquids). The calibration reference must meet a 4:1 test accuracy ratio (TAR) relative to the meter under test.
Q4: Can I calibrate a magnetic flow meter without removing it from the pipe?
Yes — this is called in-situ verification. The transmitter’s built-in diagnostics check coil drive, electrode impedance, and zero stability without physical removal. For flow-rate verification, a portable reference meter (clamp-on ultrasonic or calibrated insertion probe) provides comparison readings at multiple flow points. In-situ verification confirms performance within ±1–2 %; for ±0.2 % confirmation, bench calibration on a gravimetric or volumetric rig is required.
Q5: What is the difference between calibration and verification?
Verification checks whether the meter’s current reading falls within its stated accuracy specification — it answers “is it still good?” Calibration adjusts the meter’s internal parameters (zero, span, K-factor) to bring it back within specification if verification shows it has drifted — it answers “how do I fix it?” A verification that passes requires no adjustment. A verification that fails triggers calibration adjustment followed by a repeat verification to confirm the adjustment was successful.
Q6: How much does magnetic flow meter calibration cost?
Costs range from $150 for an in-situ transmitter-only verification to $2,500 for a full wet calibration with custody-transfer documentation. Lab calibration (meter shipped to facility) costs $300–$800 per meter. On-site calibration with a portable reference runs $400–$1,500. Add $500–$1,200 for meter removal and reinstallation labor if bench calibration is required. Flowell Corporation’s cost guide provides additional pricing benchmarks.
Q7: What causes the most calibration failures in mag meters?
Based on Jade Ant Instruments’ field data (824 meters, 2023–2025), the top three causes are: grounding faults (32 %), electrode fouling (26 %), and zero-offset drift (18 %). Together, grounding and fouling account for 58 % of all calibration failures — both are preventable with proper installation (grounding rings on plastic pipes) and scheduled maintenance (electrode cleaning cycles).
Q8: Do magnetic flow meters drift over time?
Yes, though the rate is slow compared to meters with moving parts. Turbines, Inc. confirms that all flow meters drift gradually. For mag meters, drift sources include electronic zero-offset creep (±0.1–0.5 % per year from temperature cycling), electrode fouling (2–8 % under-reading over months), and grounding degradation. Scheduled verification catches drift before it impacts process accuracy.
Q9: What tools do I need for onsite mag meter calibration?
Essential tools include: a 4.5-digit NIST-traceable digital multimeter, HART communicator or software, mA loop calibrator (±0.02 %), insulation resistance tester (500/1000 V), grounding resistance meter, and a calibrated reference flow measurement device. The reference must be ≥4× more accurate than the meter under test. See the complete tool table in Section 3 of this guide.
Q10: Where can I get professional help with mag meter calibration?
Jade Ant Instruments provides both on-site calibration verification services and ISO/IEC 17025-traceable lab calibration for all major mag meter brands. Their engineers can perform in-situ verification, diagnose persistent accuracy issues via remote HART access, and arrange bench calibration with full as-found/as-left documentation. For additional resources, consult Emerson’s magnetic flow meter resources, KOBOLD’s calibration significance guide, and Metlan’s comprehensive calibration guide.
References: Soaring Instrument — Causes of Errors in Magnetic Flow Meters; Endress+Hauser — Best Practices for Flow Calibration Management (White Paper); Emerson — Calibration Verification Practices for Rosemount 8700 (Technical Note); ABB — In Situ Verification Made Easy (White Paper); Tameson — Electromagnetic Flow Meter Calibration Guide; KOBOLD USA — Significance of Calibration in Flow Meters; Kytola Instruments — What Is Flow Meter Drift; Turbines, Inc. — What Causes Flow Meter Drift Over Time; Holykell — 6 Common Faults of Electromagnetic Flow Meters; GAIMC — How to Calibrate Magnetic Flow Meter; Flowell Corporation — Flow Meter Calibration Cost Guide; ISO/IEC 17025 — General Requirements for Competence of Calibration Laboratories; ISO 20456 — Electromagnetic Flowmeters; OIML R49 — Water Meters; FDA 21 CFR Part 211 — cGMP for Finished Pharmaceuticals; Jade Ant Instruments (2023–2026) — Field-Service Database, Calibration Records, Installation Best Practices Guide.